Dual-boot allows a user to choose one of two operating systems to start up on the same machine, with one of the most popular choices being Windows and Linux. Wondering how to dual boot Windows and Linux? This guide will show you how to configure a dual boot on your computer and seamlessly switch between the operating systems after installation.
Prerequisites
To get started, you will need the following items:
1. USB flash drive (or DVD)
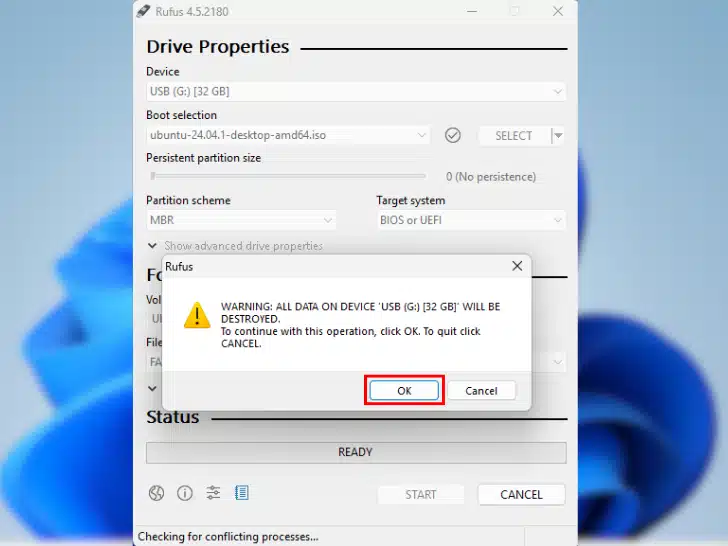
I recommend installing Ubuntu via flash drive since they’re faster than DVDs. Creating bootable media erases everything on the flash drive. Therefore, it is important to back up your data.
2. Linux iso
Download the Ubuntu ISO image.
3. Rufus
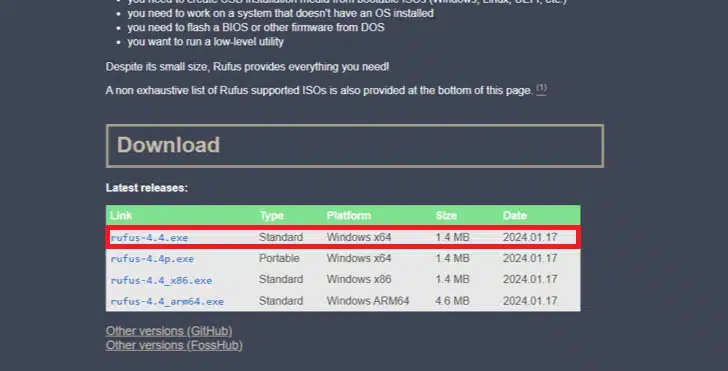
Download a tool that converts ISO files to bootable USB drives. For this tutorial we used a tool called Rufus. Here’s how to download it securely and safely step-by-step:
- Visit https://rufus.ie, the official Rufus website.
- Locate the Download area by scrolling down the webpage.
Before setting dual boot
Methods differ per Linux distribution. Ubuntu Linux supports Secure Boot, thus we’re utilizing that here. Not all Linux distributions support Secure Boot.
If your Linux distribution supports Secure Boot, you may skip this step and go straight to Step 1 of dual boot configuration, installing a USB otherwise disable secure boot.
How to Disable Secure Boot
Although it may appear difficult at first, disabling Secure Boot on your computer is simple if you carefully follow these instructions. Here’s how to accomplish it:
- Restart your pc.
- During computer power up (usually on black screen) immediately start repeatedly pressing the key (usually F2, F10,
Esc, or Del) until you see bios.
| Manufacturer | BIOS Menu Key |
|---|---|
| Acer | F2 |
| ASUS | Del or F2 |
| Dell | F2 |
| HP | F10, Esc |
| Lenovo | F2, Novo button |
| MSI | Del |
| Samsung | F2 or Esc |
| Toshiba | F2 |
Note
Different PC manufacturers have different bios menu keys. Check the company’s website for details.
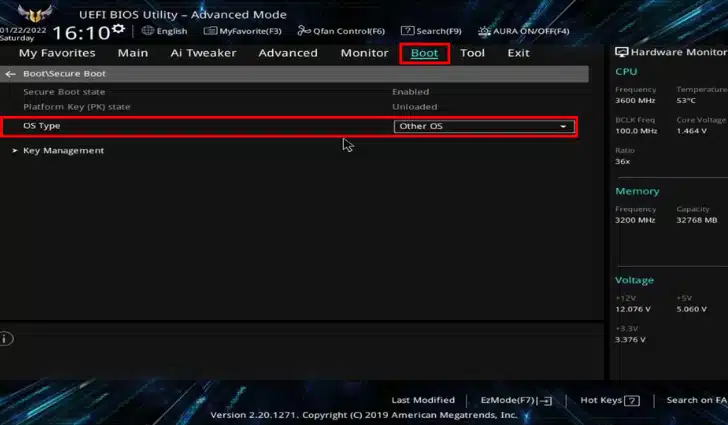
- Find the option labeled Secure Boot and disable it.
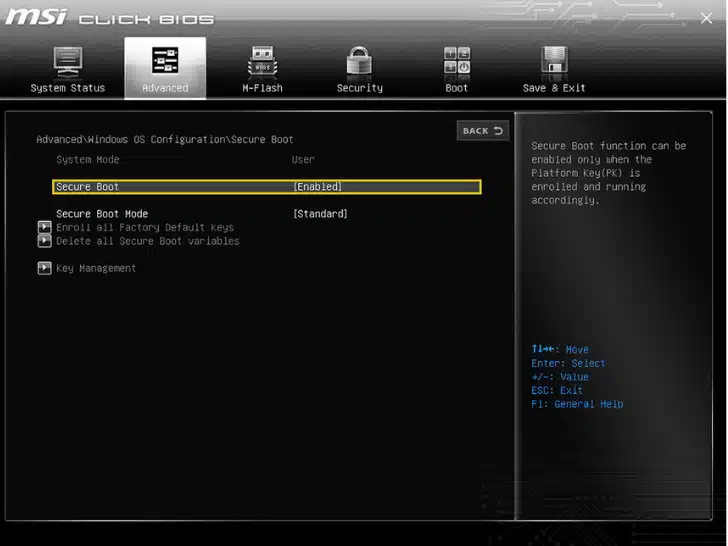
You may have different UI and settings for the BIOS depending on the company.
For some users, if you have the “OS Type” option available, set it to “Other OS” under the Boot section.
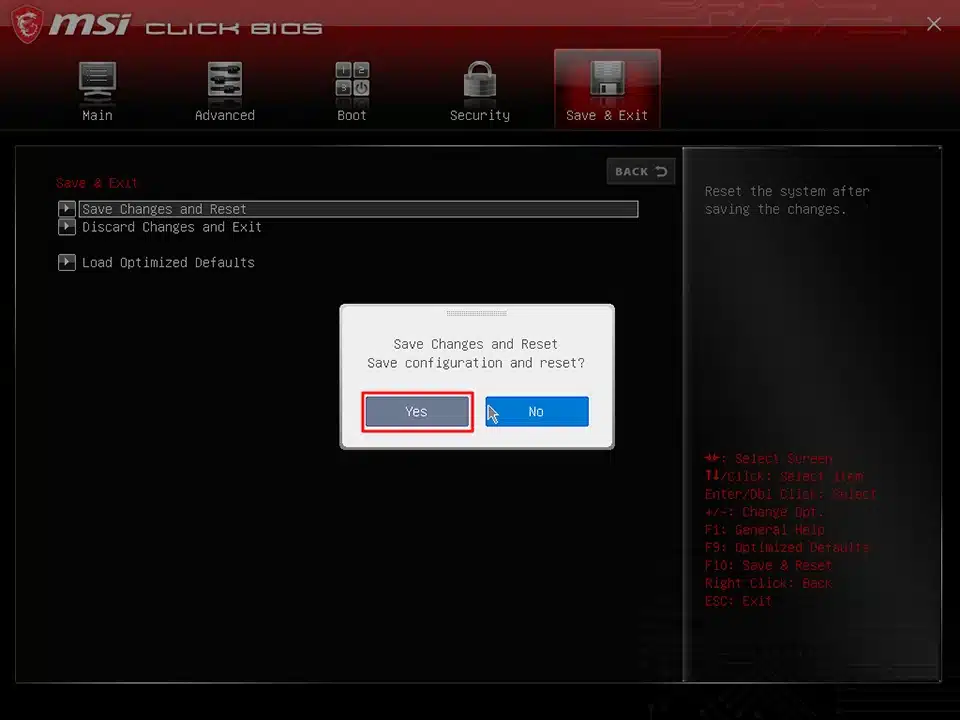
- Save Changes and Exit
Step 1 of dual boot setup: making a USB for Linux installation
Depending on the kind of Linux distribution you want to use, these steps may be slightly different. Again, for these steps, we’re using Ubuntu Linux as an example:
- Insert a USB into the computer and run the rufus tool.
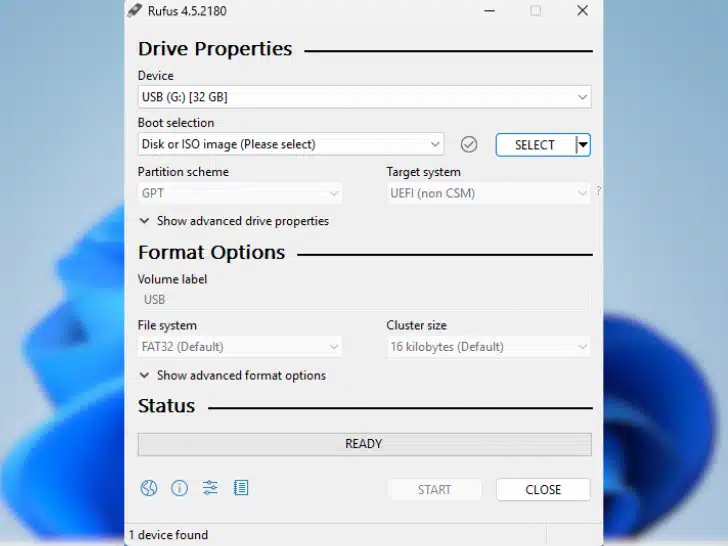
- Choose your USB drive from the Device selection option.
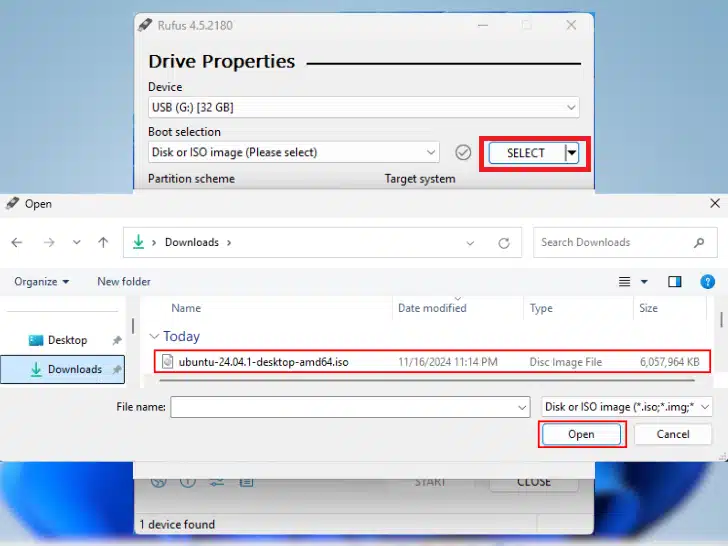
- Choose the ISO file that was downloaded from the SELECT dropdown menu.
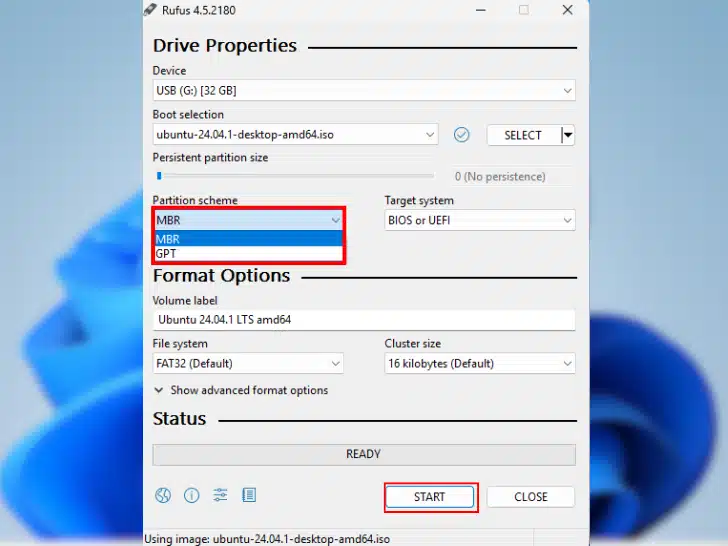
From the Partition Scheme dropdown menu, choose MBR (for some Linux distributions, GPT might work).
- Select Write in ISO Image mode and click OK.
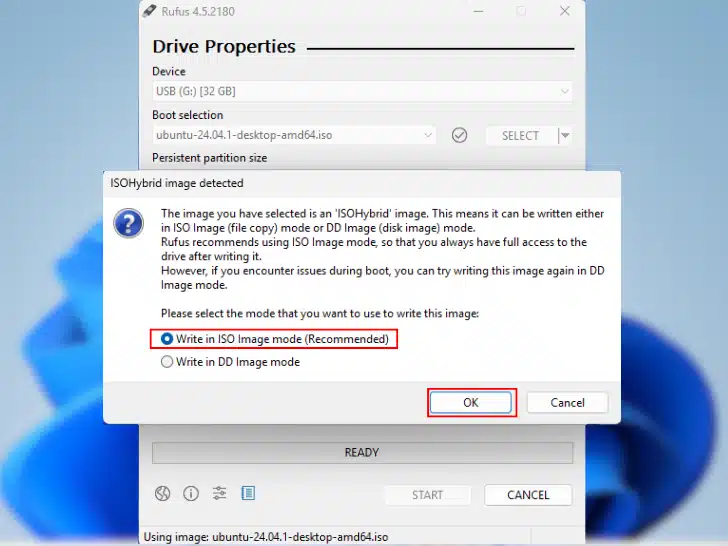
- Carefully read the pop-up to make sure you back up the data if important for you otherwise you may not be able to recover your data
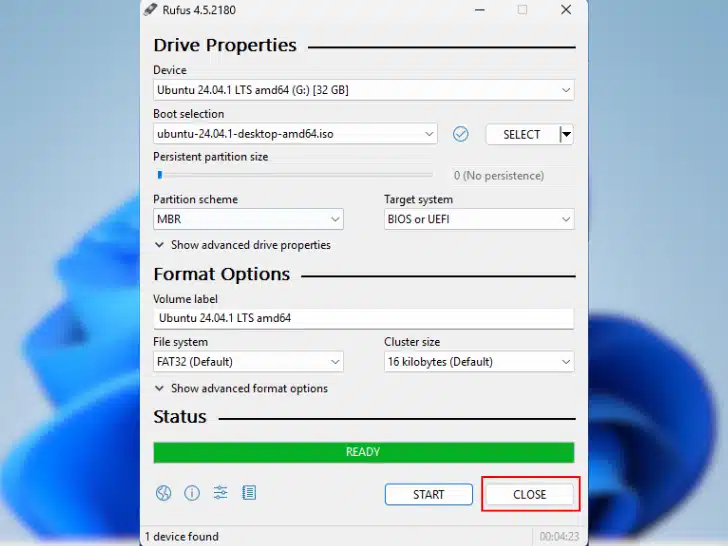
- Close rufus.
Step 2: Create a partition
You must first create a partition in order to effectively dual boot Linux and Windows on your PC. To do this, take these actions:
- Select Disk Management from windows search.
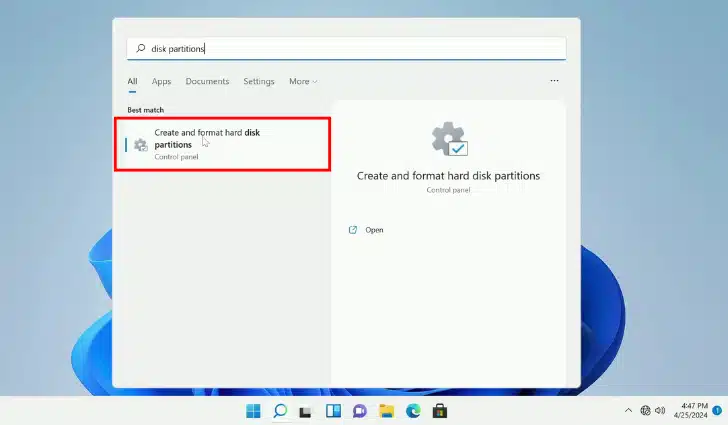
- Right click on the largest partition. Select Shrink Volume.
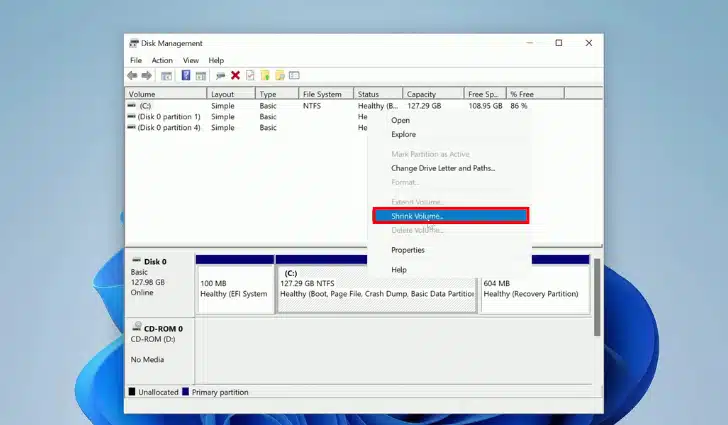
Alert
You can also install Linux on a separate disk instead of a Windows partition. In my case, I only have one disk.
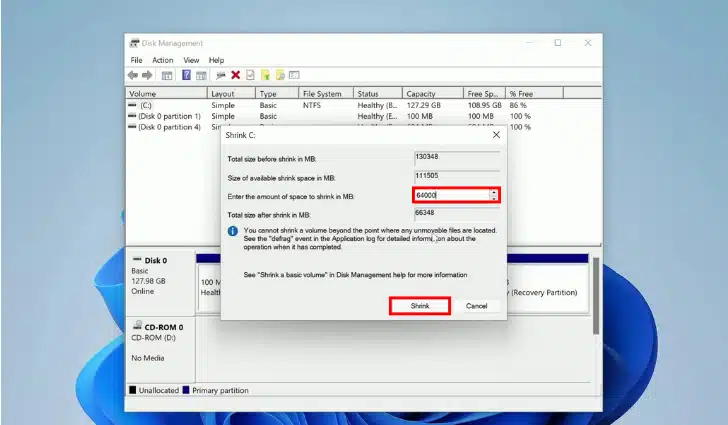
- Assign volume space to partition disk. For example, if the Linux distro needs 62.5GB (assume), you will need 62.5 x 1,024, or 64,000MB. Specify this number as the amount of space you want to be removed from the partition and select Shrink.
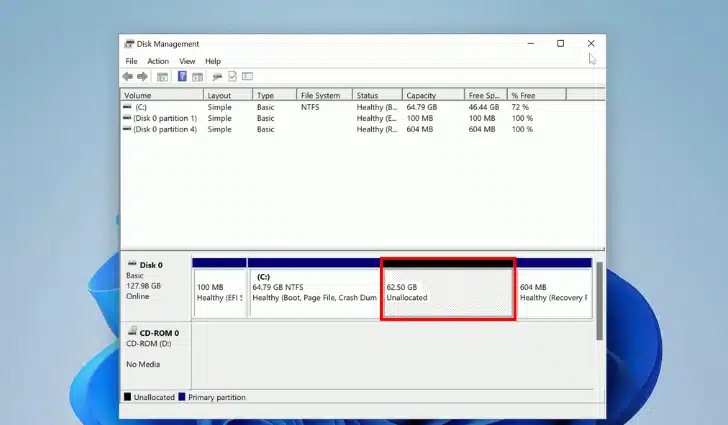
- This will show up as “Unallocated”.
Step 3: how to install Linux for dual boot
The following are the steps to install Linux for dual boot.
- Restart your computer.
- Enter into the boot menu following steps
- During computer power up (usually on black screen) immediately start repeatedly pressing the key (usually F2, F10, F12, or Del) until you see the Boot Menu.
- Select USB drive from boot menu
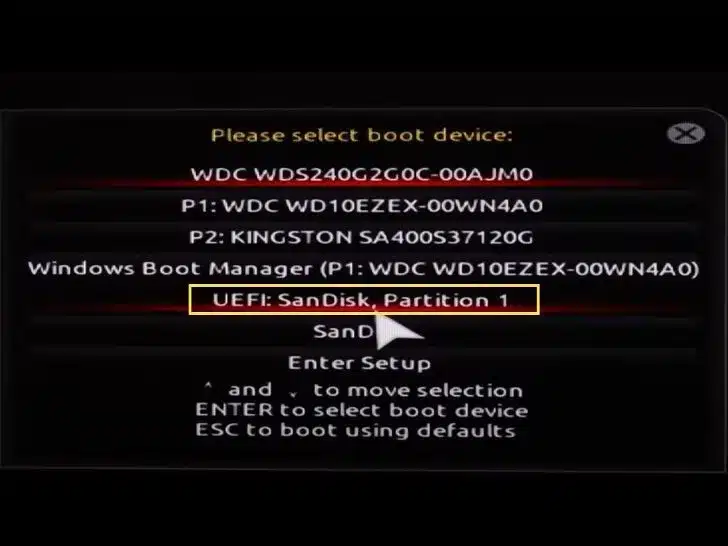
Note
Different PC manufacturers have different boot menu keys. Check the company’s website for details. Also, the name of your USB drive may vary.
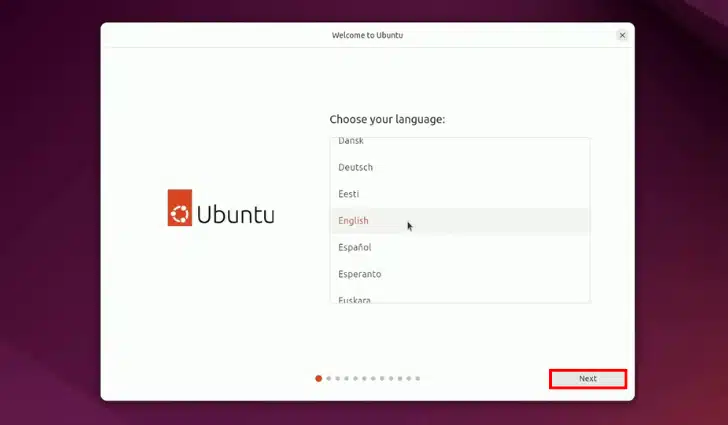
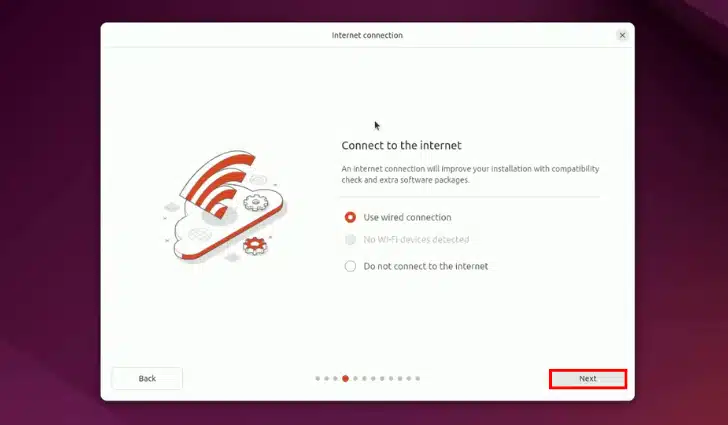
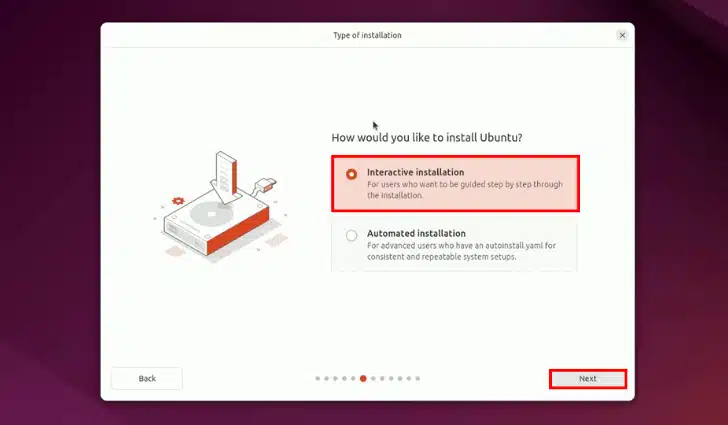
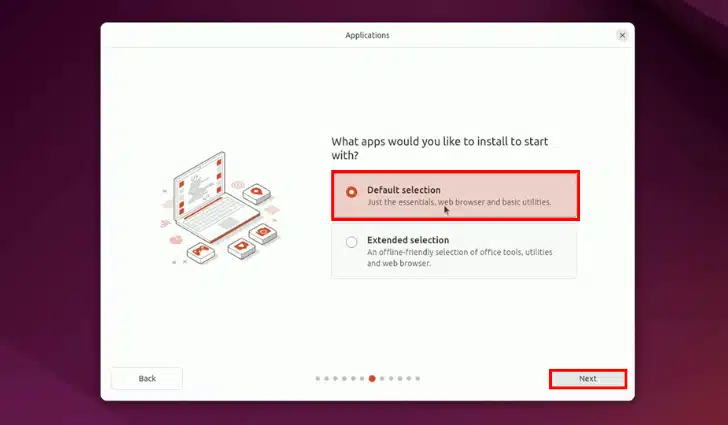
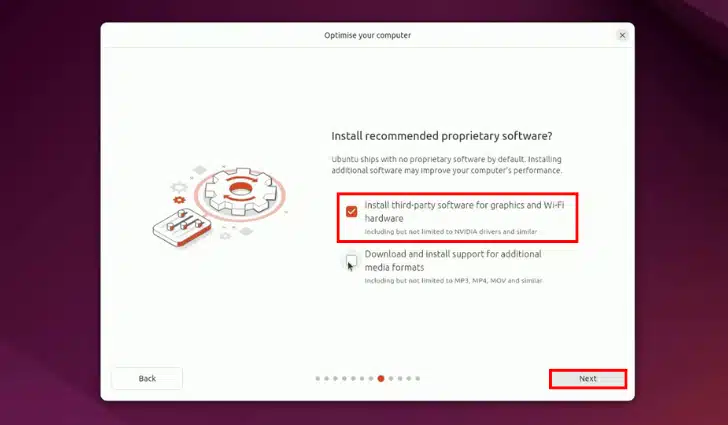
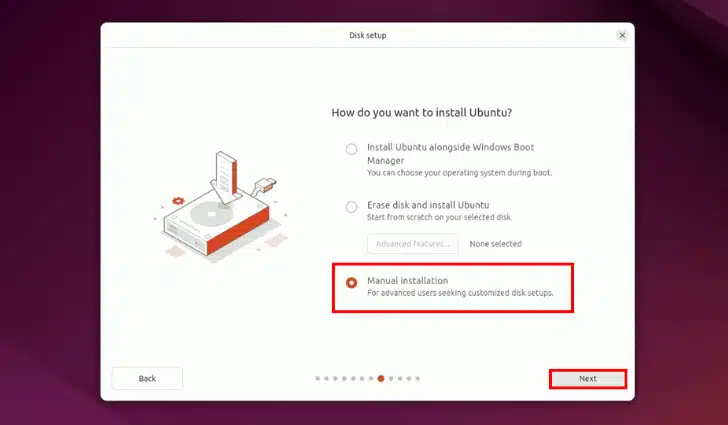
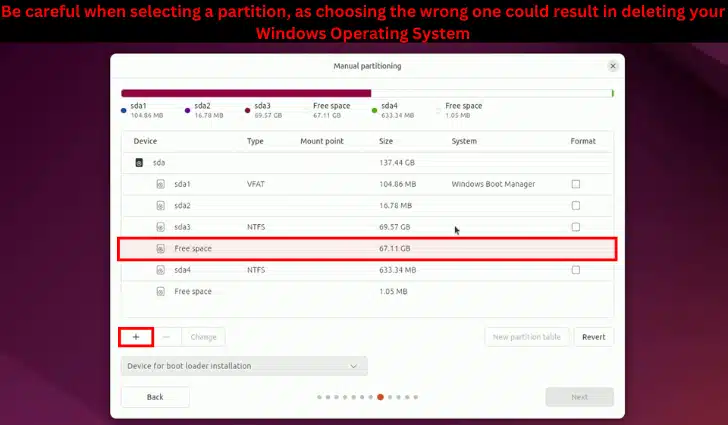
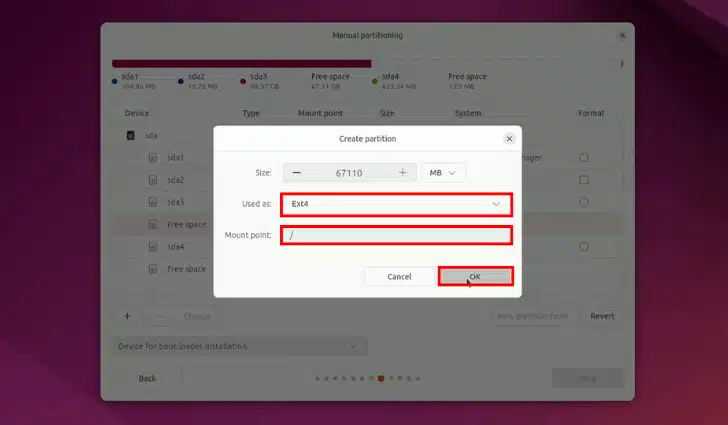
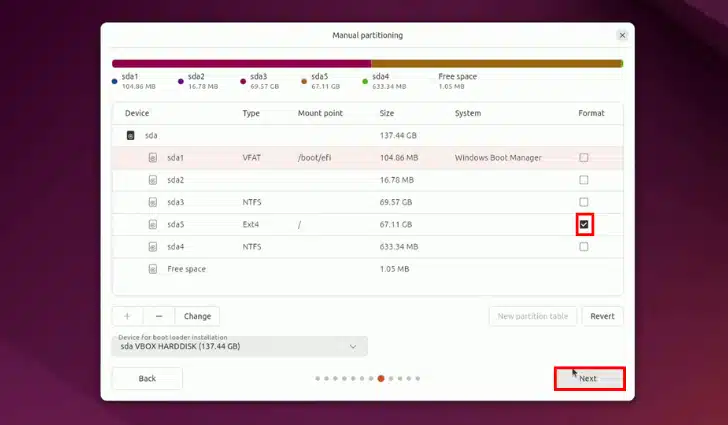
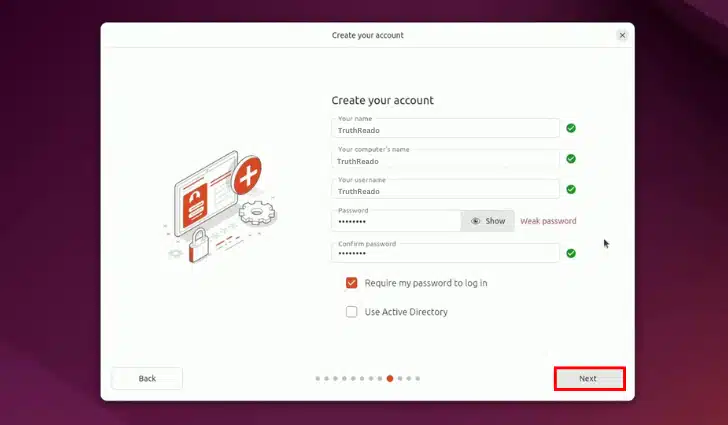
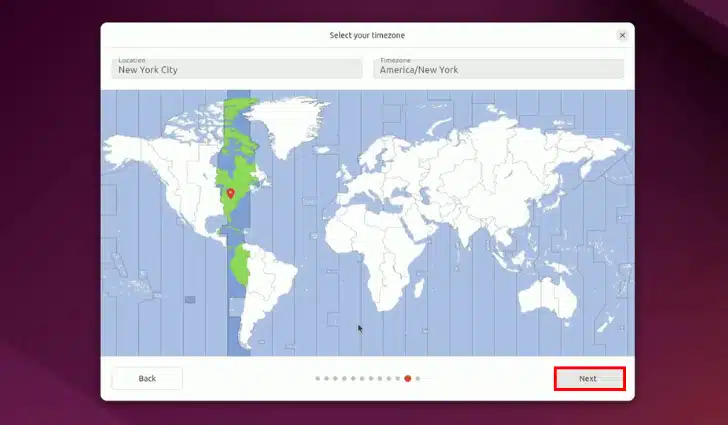
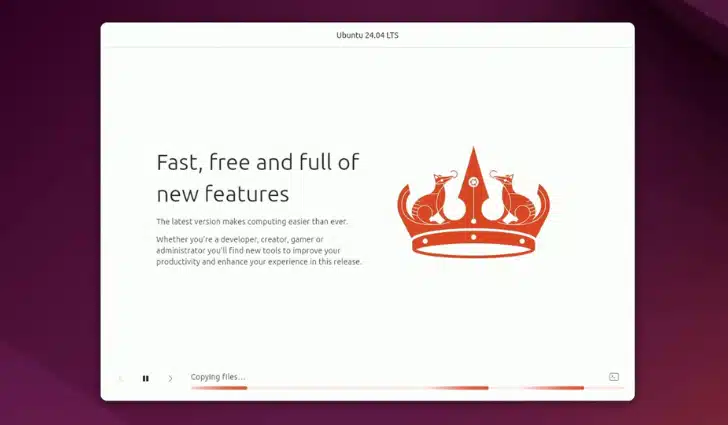
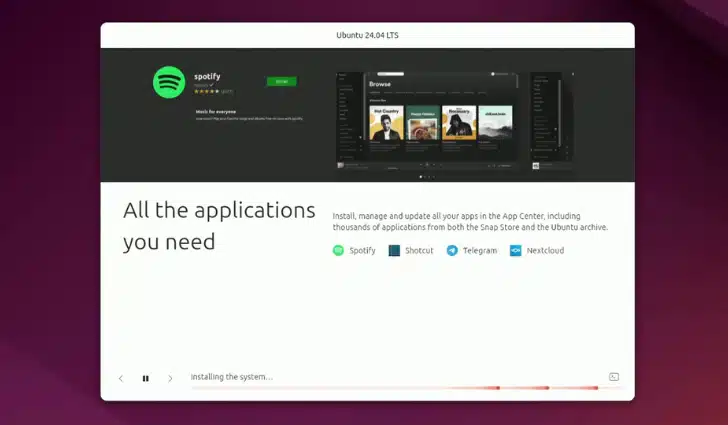
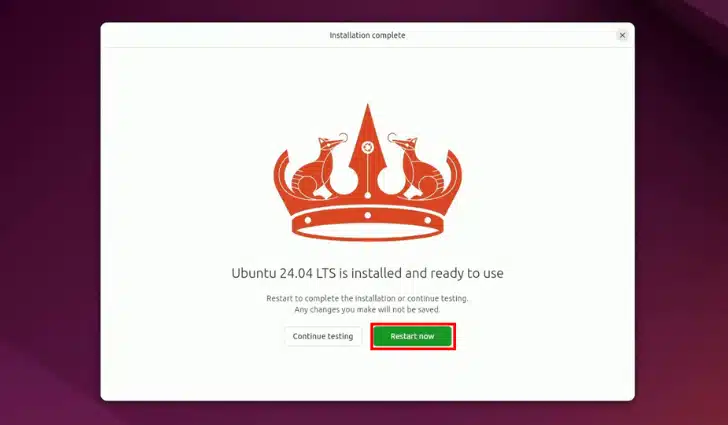
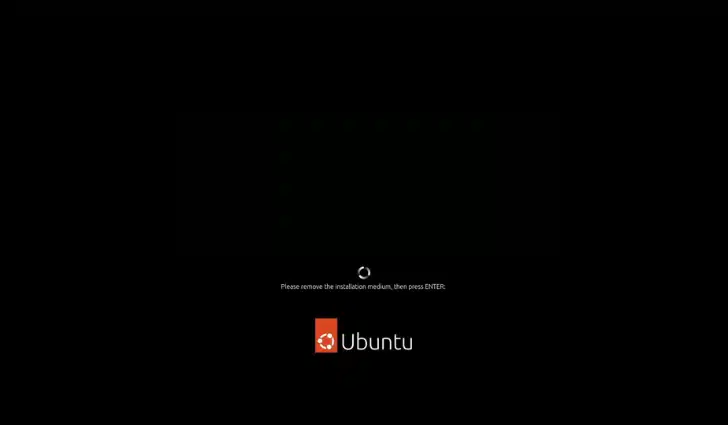
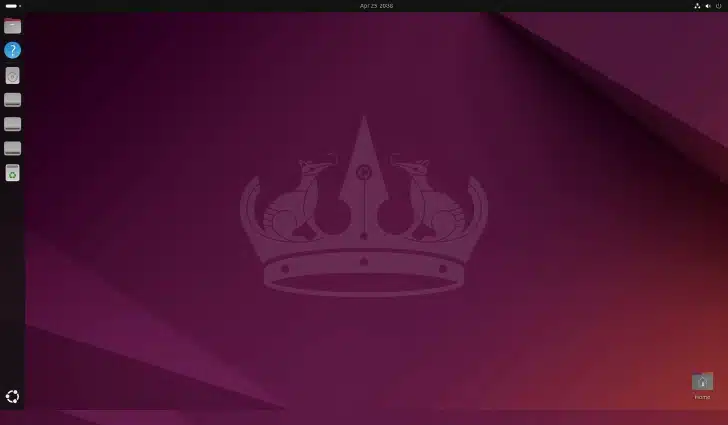
Now, the following are the steps you need to follow to install Ubuntu (Linux) for dual boot, with images attached.
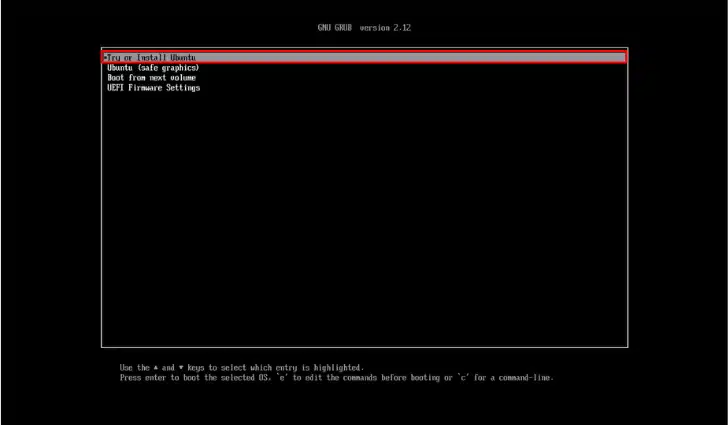
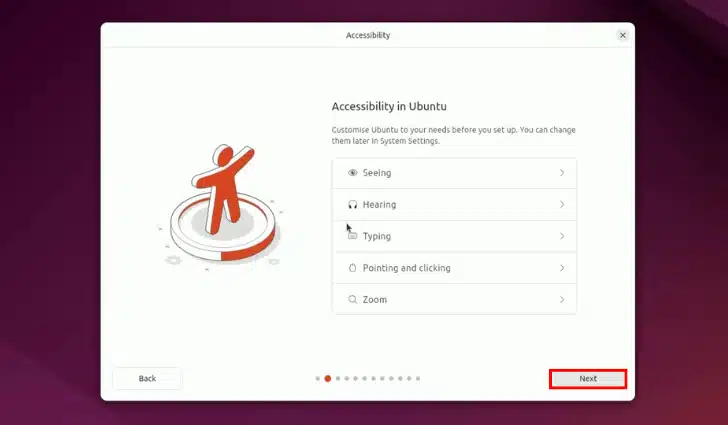
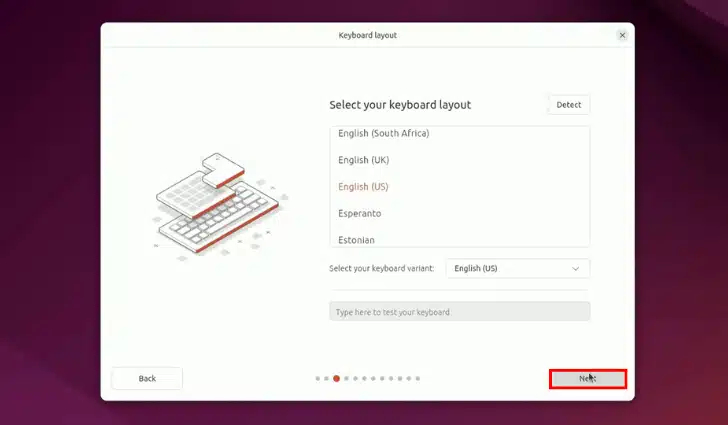

How to switch between operating systems
In most cases, you will be able to switch between Windows and Linux after restarting like this
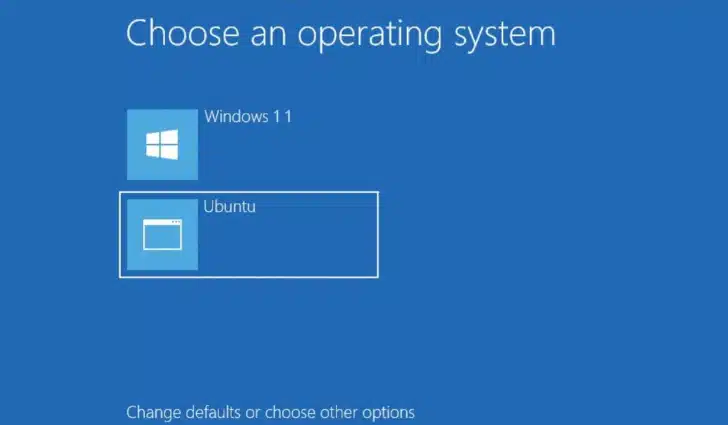
But if you don’t have any option then follow these steps
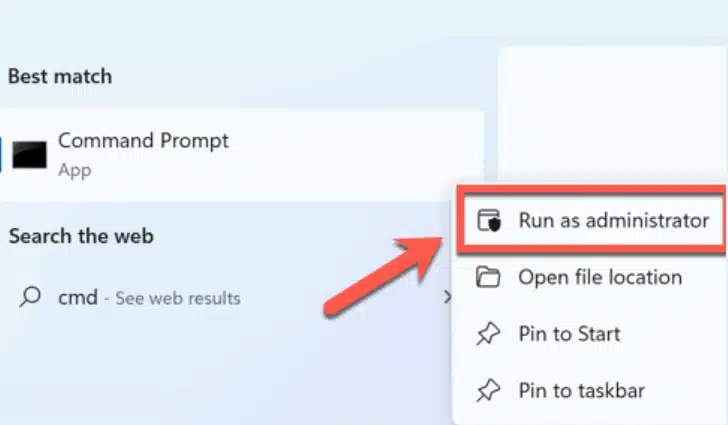
- Open Command Prompt as Administrator
Click the Search icon in the taskbar.
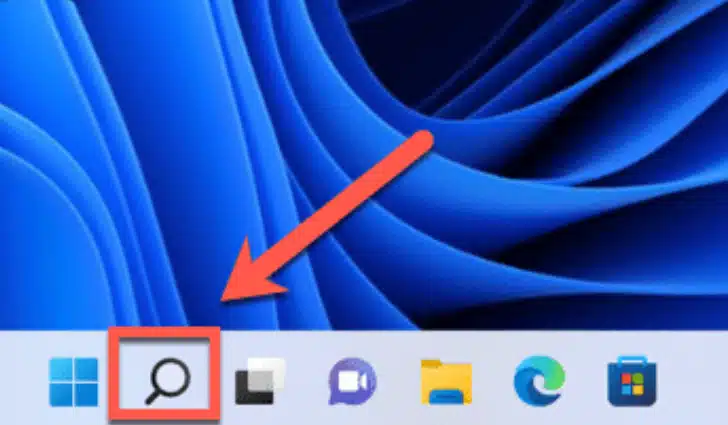
Type cmd, then right-click on the Command Prompt app and select Run as Administrator.
- Enable the Boot Menu
Type the following command and press Enter
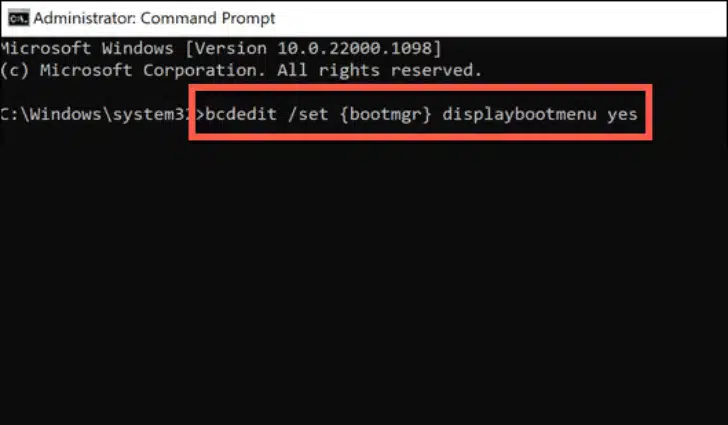
bcdedit /set {bootmgr} displaybootmenu yes
- Verify the Operation:
If the command is entered correctly, a message will appear stating that the operation was completed successfully.
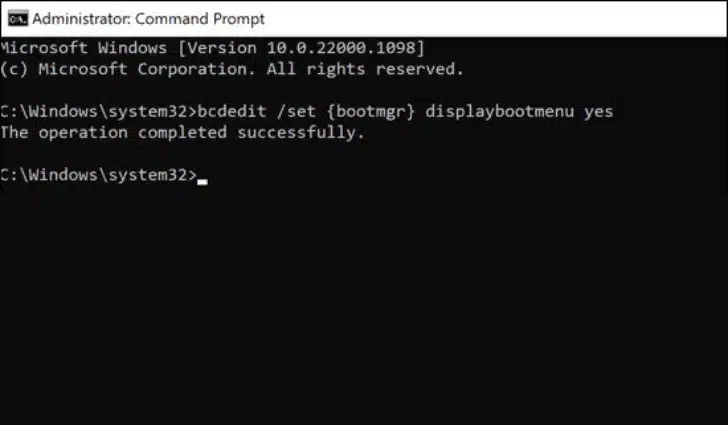
- Restart Your Computer:
Reboot your system to check if the dual boot option is now visible.

